

Built-in metrics
Seven built-in metrics use Arklex’s default scoring rubrics and are available in every evaluation without configuration: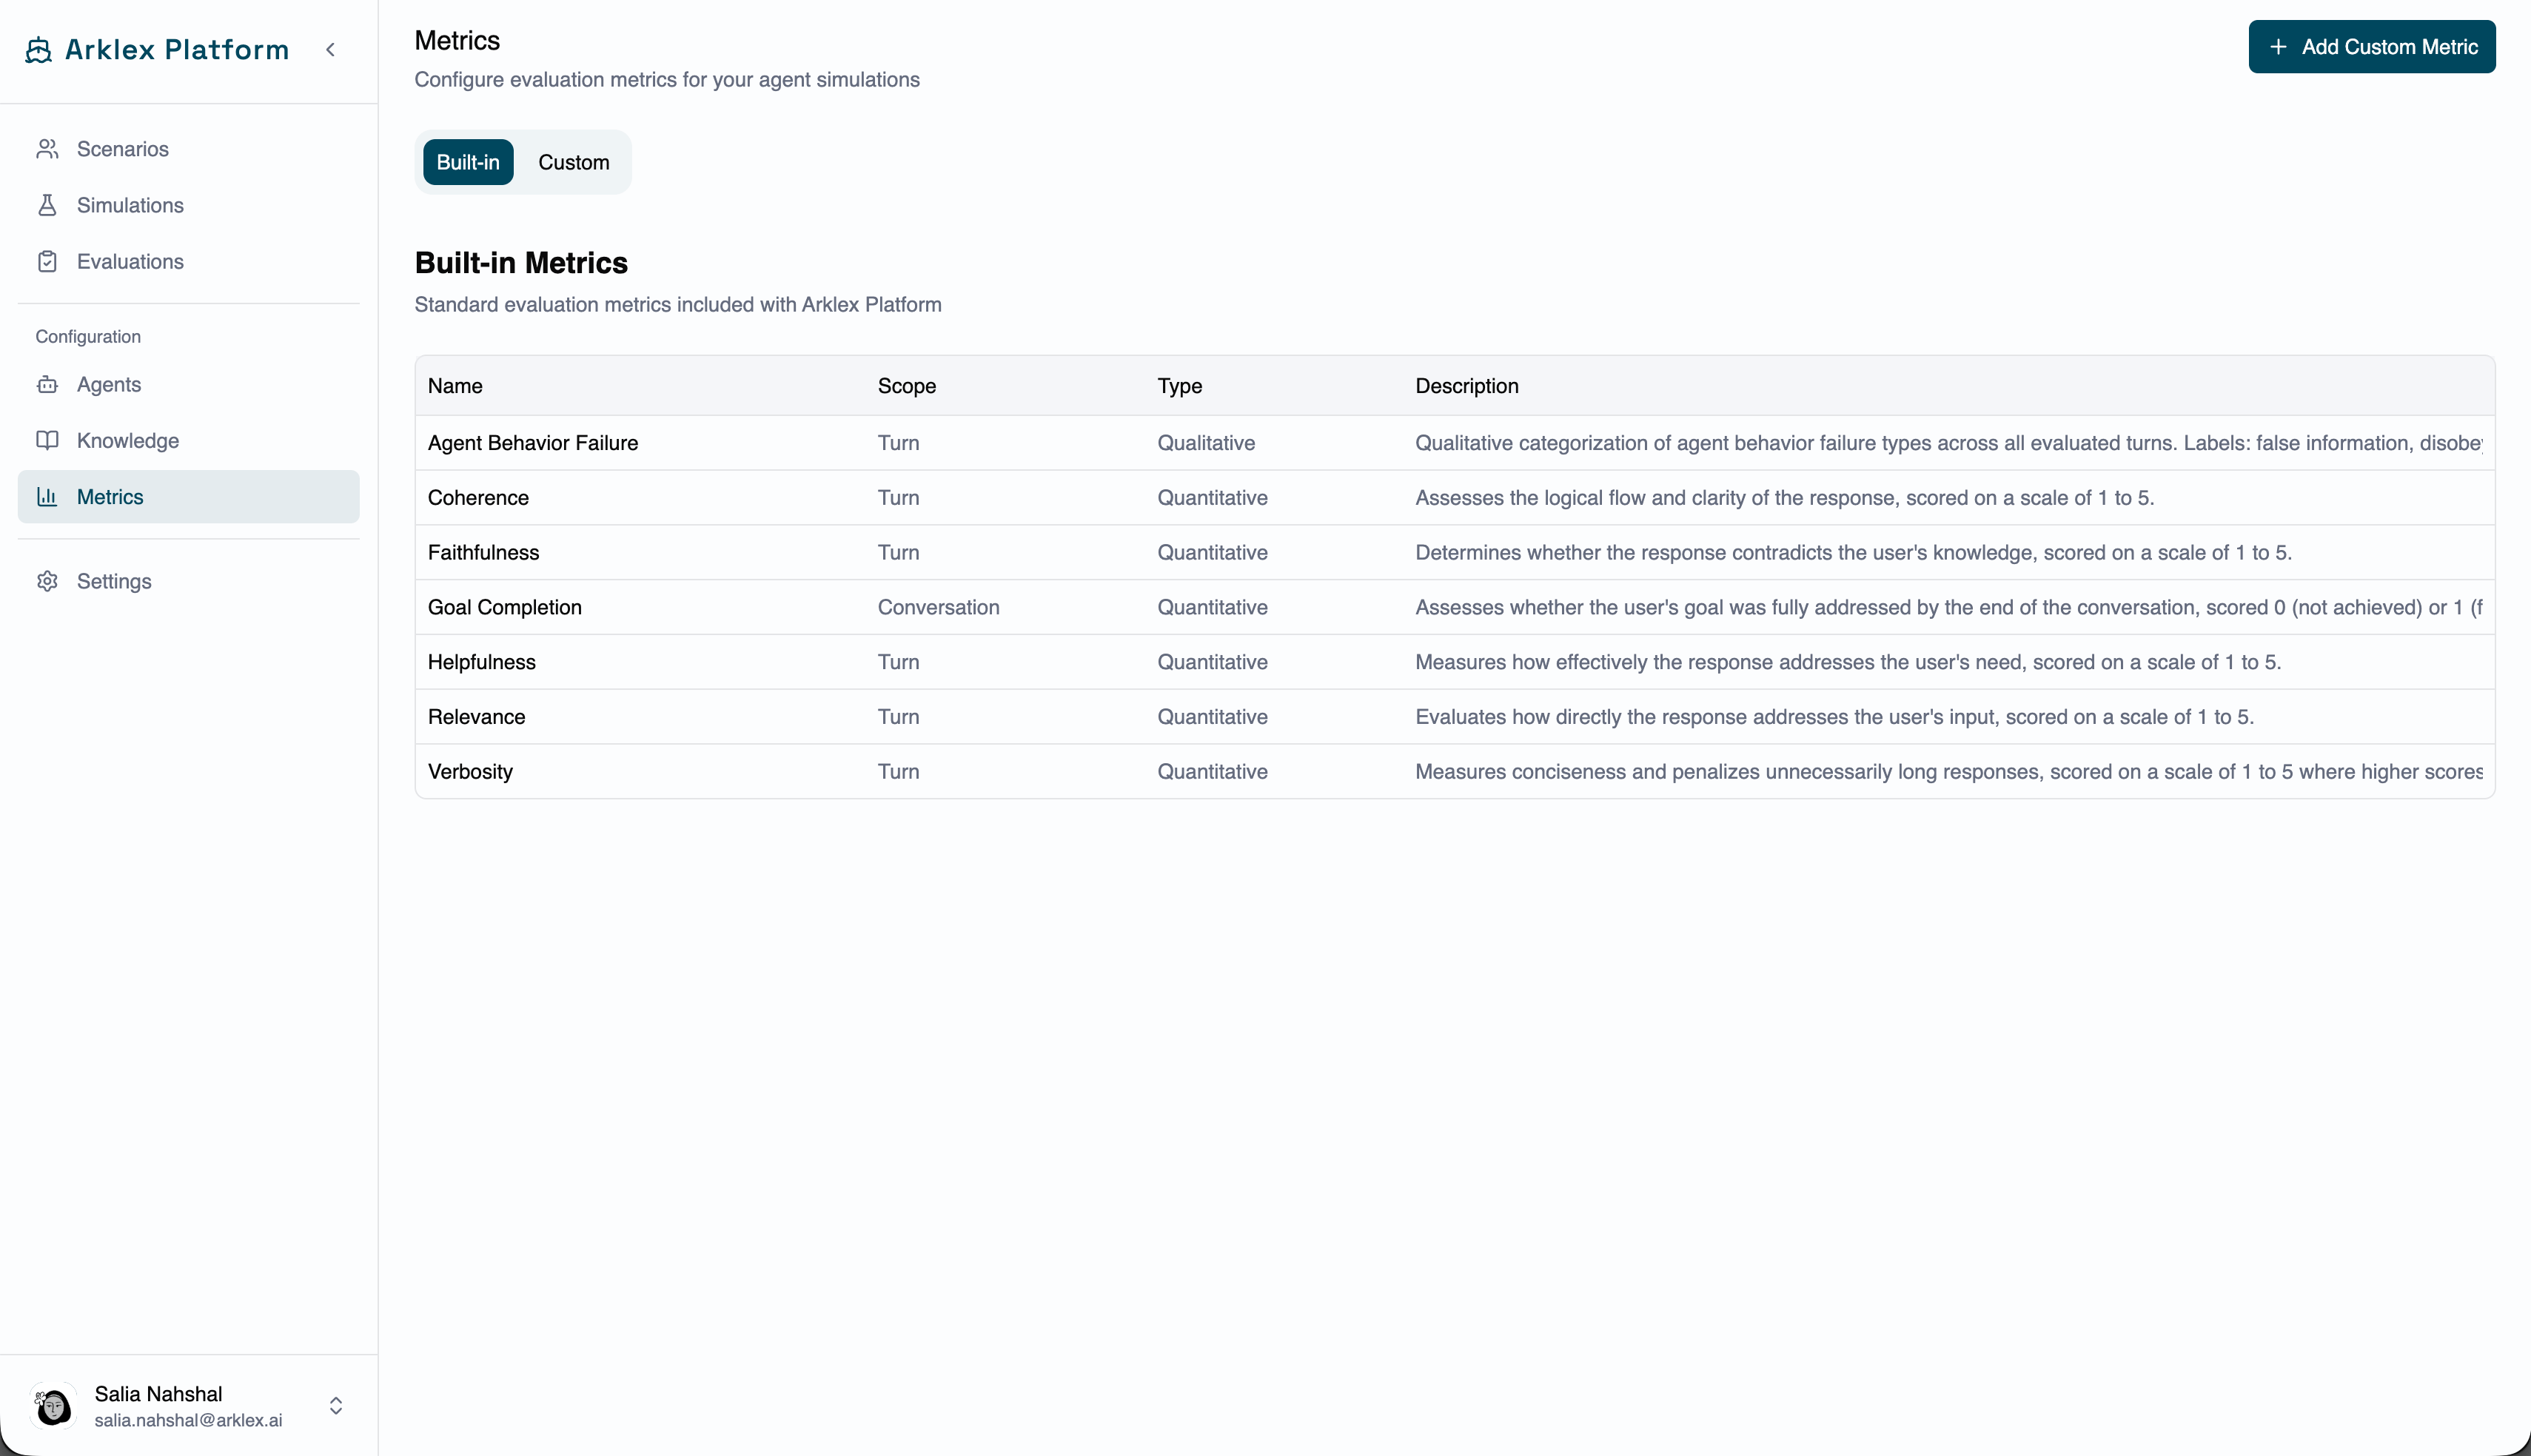
Create a custom metric
Custom metrics let you score domain-specific behaviors. Navigate to Metrics in the sidebar and click New Metric (or the + icon), then fill in the form:string
required
A short label — e.g. “Identity Verification Compliance” or “Policy Accuracy.”
string
A one-sentence description that appears as a tooltip in evaluation results.
string
required
Whether the metric produces a numeric score (Quantitative) or a category label (Qualitative).
string
required
Whether to score each assistant turn independently (Turn) or the full conversation once (Conversation).
string
required
The fixed instruction the judge receives, describing its role and how to apply this metric.
string
required
The per-turn or per-conversation prompt the judge uses to produce a score. Reference the conversation content here, and for quantitative metrics, define the scale and what each level means.
object
For quantitative metrics, set the score range (e.g. 1–5 or 0–1). For qualitative metrics, define the label options the judge can assign.
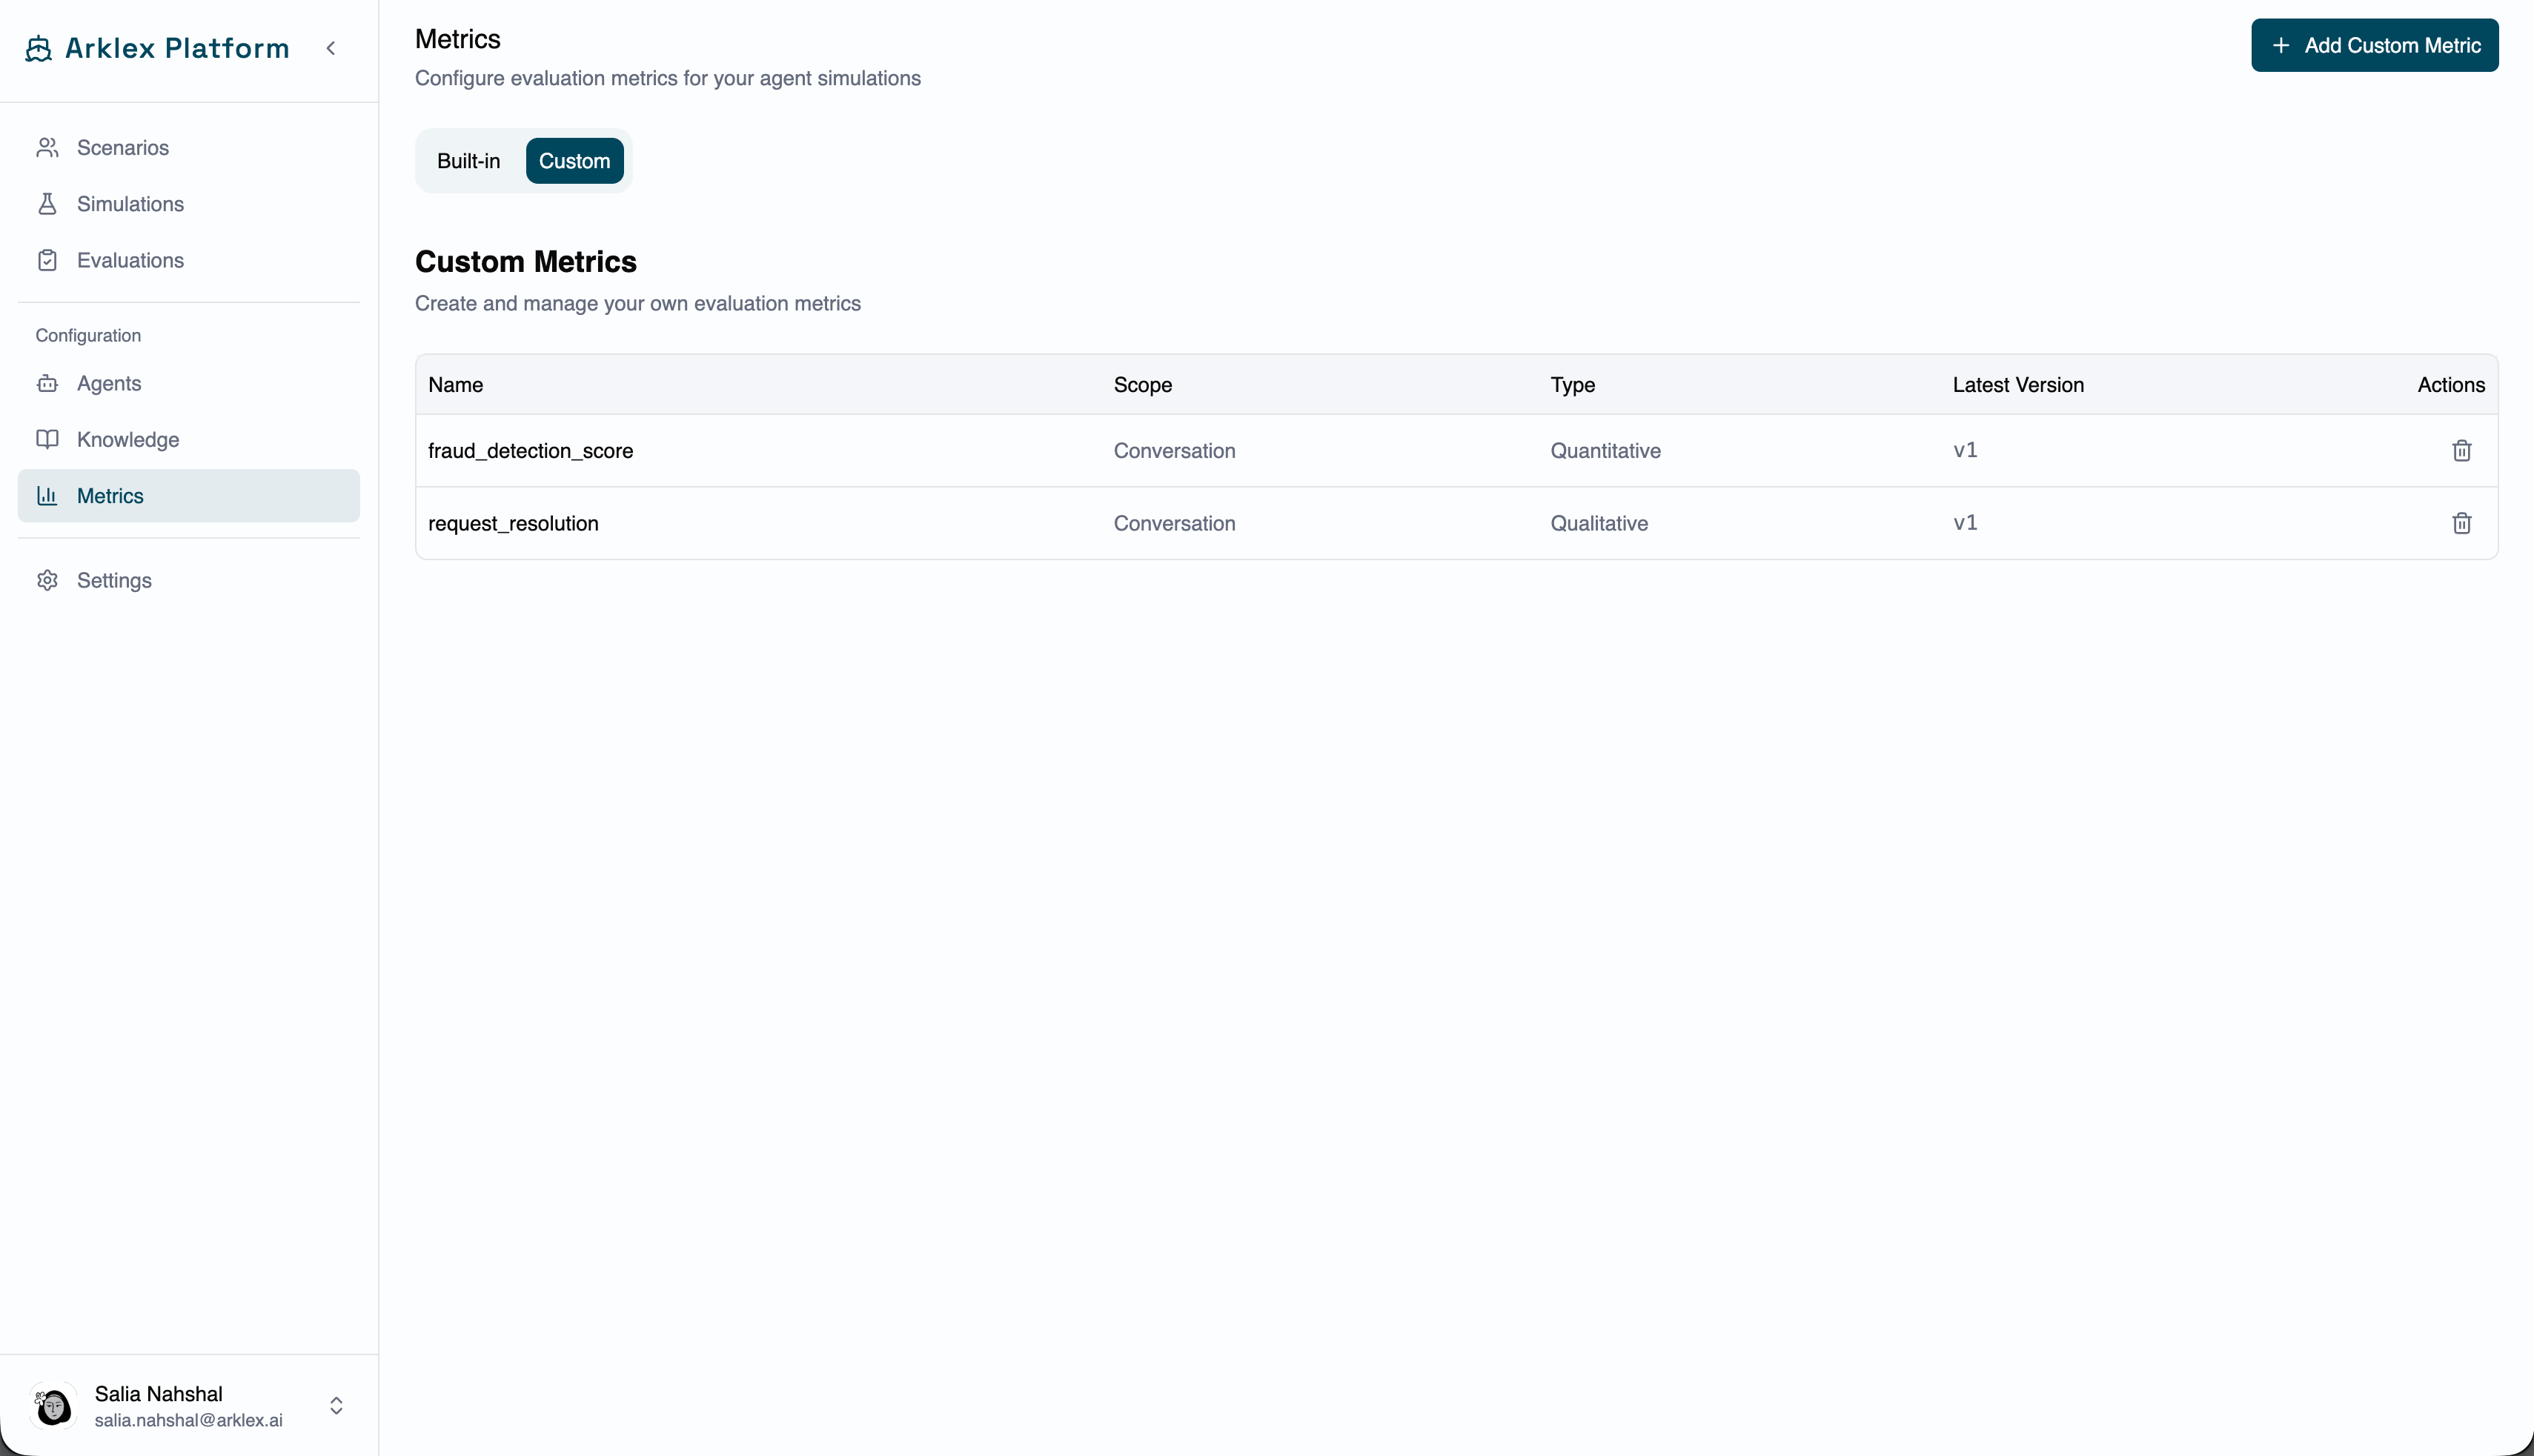
Manage custom metrics
Click a metric row to open its detail view. Edit — Change the name, description, or prompt and click Save. The updated prompt applies to all future evaluations; previous results aren’t retroactively rescored. Version history — Each save creates a new version. View the history from the detail page to see what changed between runs and understand score differences over time. Delete — Use the delete action on the detail page. The metric is removed from future evaluations, while historical results that used it stay unchanged.Select metrics for an evaluation
When creating an evaluation, the Metrics selector lists all available metrics grouped by type — Custom first, then the seven Built-in metrics. Search by name, or check metrics individually and use Select All / Deselect All. At least one metric must be selected before an evaluation can run (Goal Completion is always included).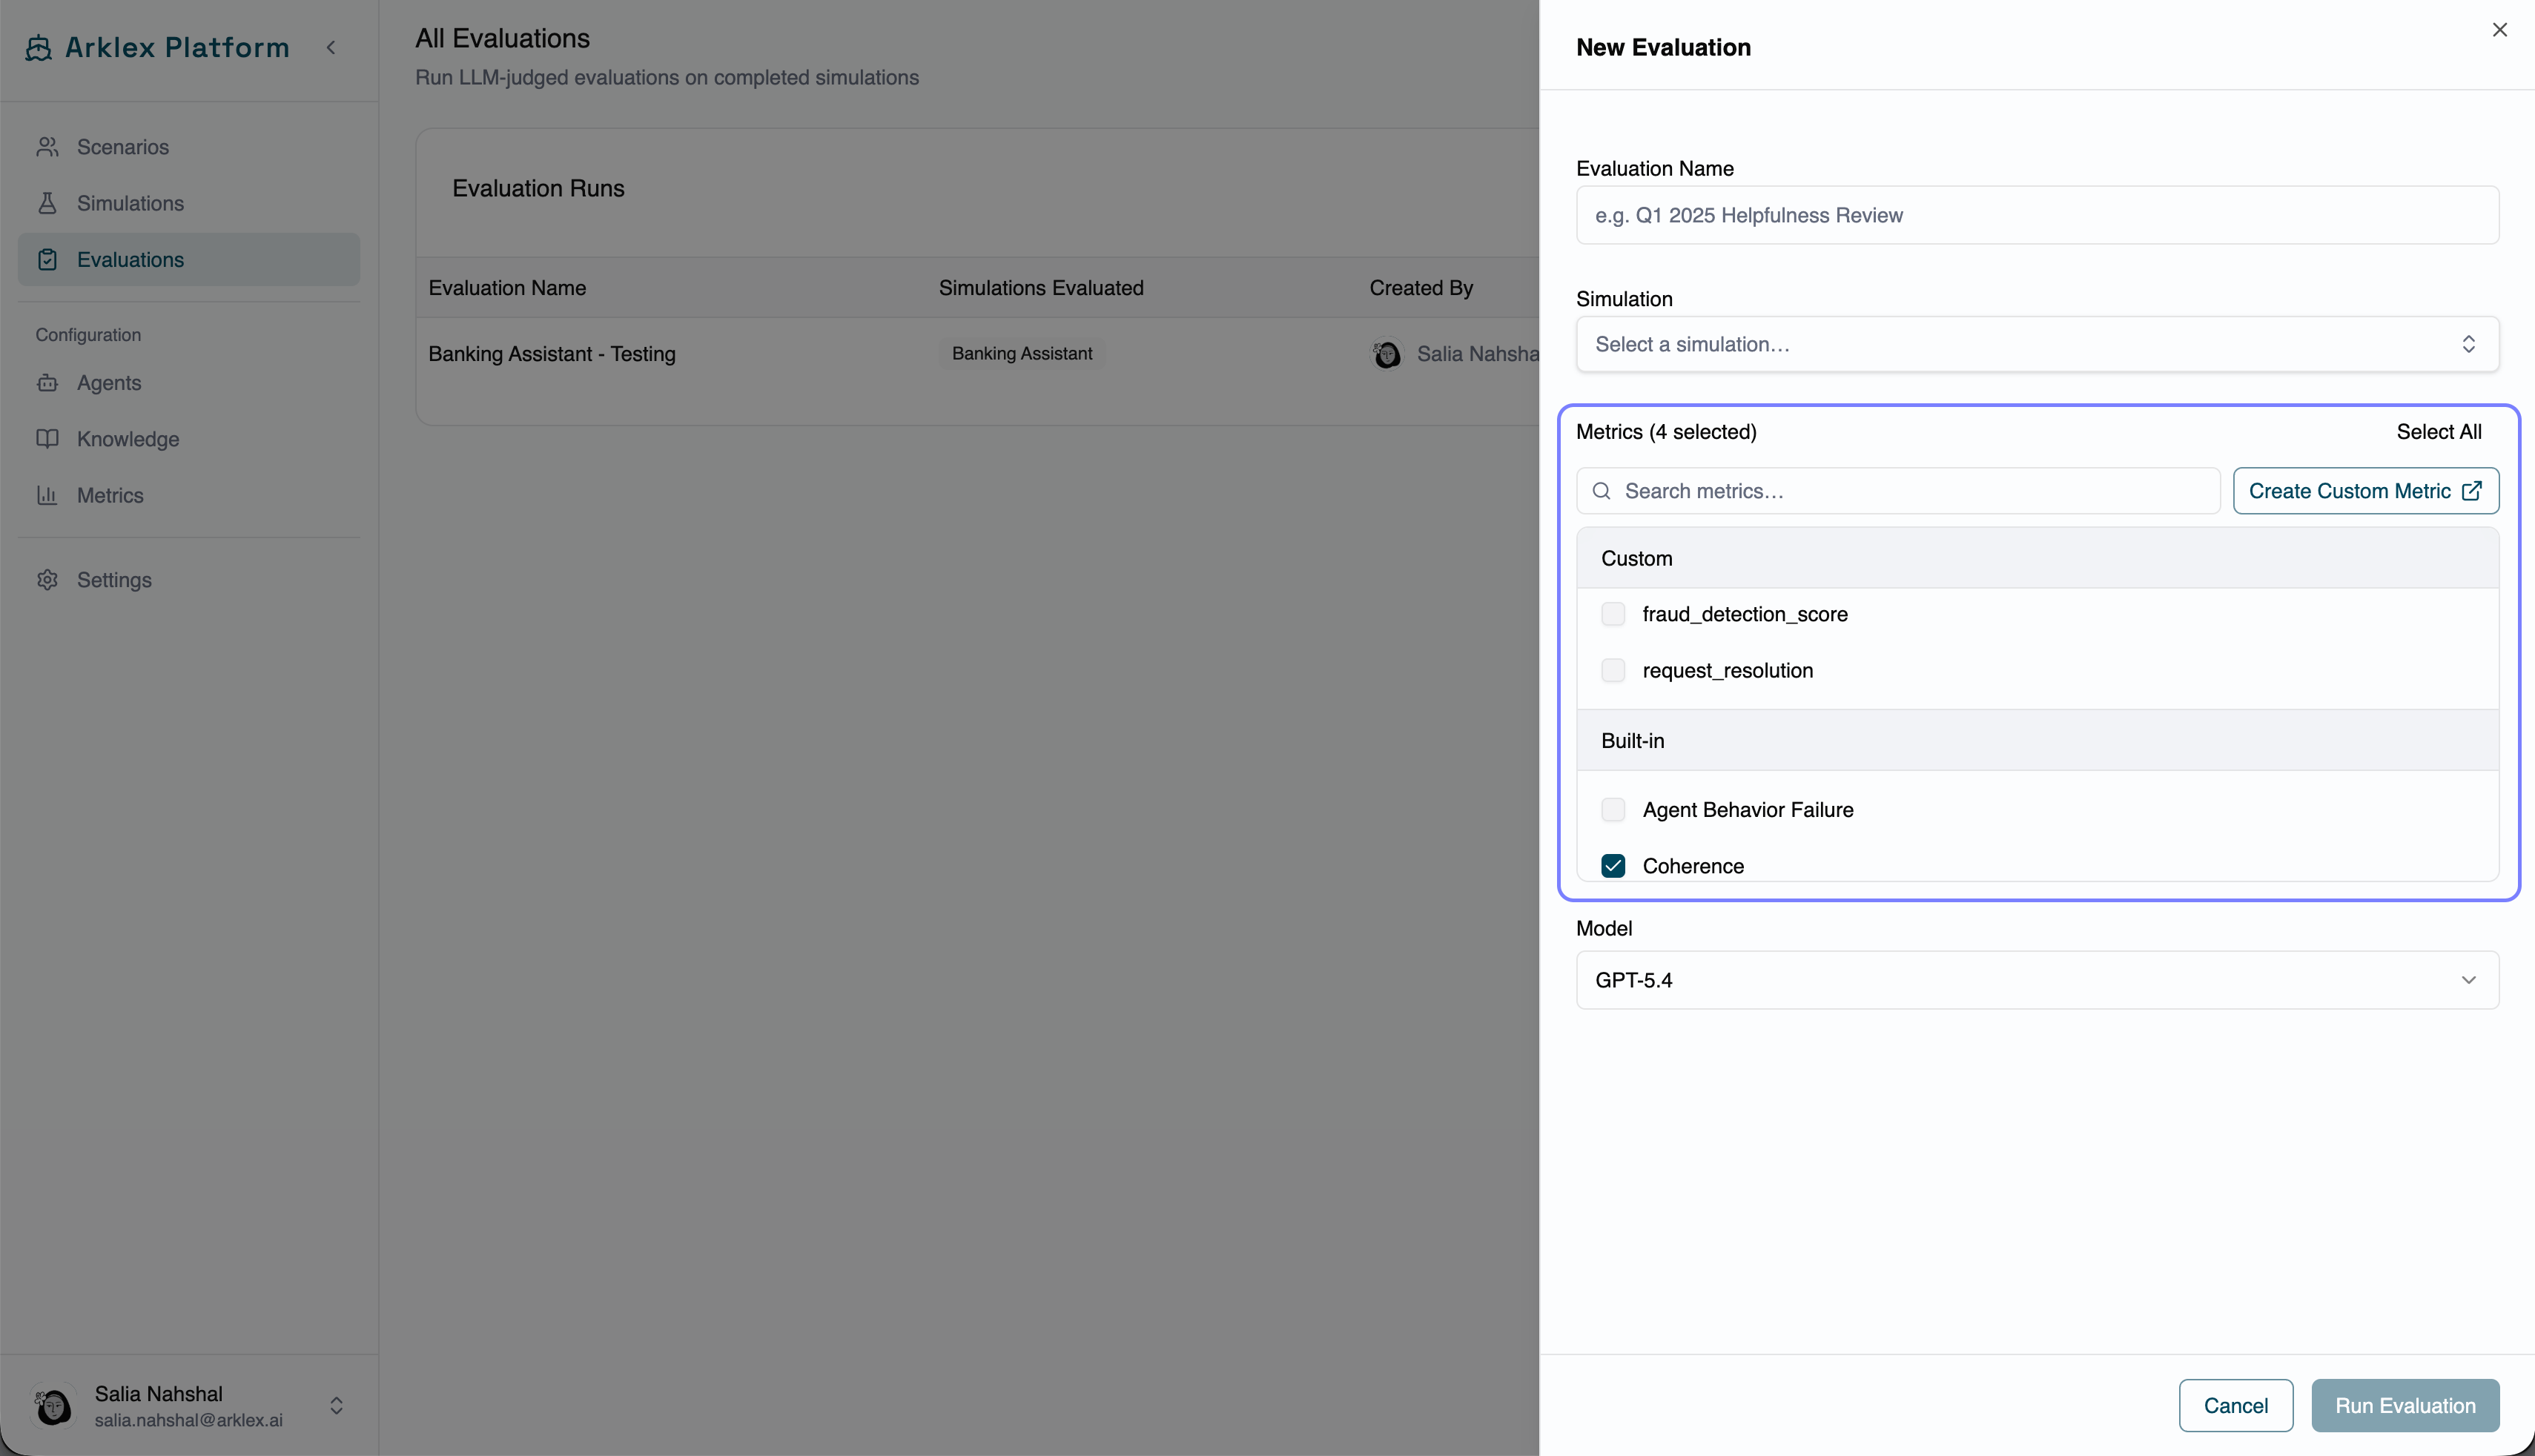
Refine a metric automatically
When your team’s annotations consistently disagree with the judge’s scores on a metric, Metric Alignment distills those disagreements into a refined rubric automatically — no manual prompt rewriting. See Metric Alignment for the full workflow.FAQ
How do I choose which metrics to include?
How do I choose which metrics to include?
Start with the built-in metrics most relevant to your agent’s purpose — for a banking assistant, Helpfulness, Goal Completion, and Faithfulness are usually the most informative. Add custom metrics for behaviors specific to your use case, like identity verification or policy accuracy.
Can I use custom metrics alongside built-in ones?
Can I use custom metrics alongside built-in ones?
Yes — mix and match freely. Each metric is scored independently.
Does the choice of LLM judge affect scores?
Does the choice of LLM judge affect scores?
Yes. Different models interpret rubrics differently. Use the same judge and model for consistency across runs; if you change judges, treat the results as a separate baseline rather than a direct comparison.
How many custom metrics should I create?
How many custom metrics should I create?
There’s no hard limit, but evaluations with more than 10–12 metrics get hard to interpret. Focus on the 3–5 that best capture the behaviors you care about.