

New here? The Quickstart walks you through generating your first scenarios end to end. This page is the full reference for every mode and field.
Scenario groups
Scenarios are organized into scenario groups — a logical collection of related scenarios, such as all scenarios for a product category, support topic, or user segment (e.g. a “Core Support” group covering balances, transfers, and card issues). Navigate to Scenarios in the sidebar to see every group in your organization. Click a group to open it and view the scenarios it contains. You create a group before adding any scenarios to it: every way of adding scenarios — generating, importing, or saving — targets a group that already exists. Create a group with a name and an optional description, then open it to start adding scenarios.Create scenarios
There are four ways to add scenarios. Pick based on how much you have to start from:
Open the group you want to add to (creating one first if you haven’t yet), click Add Scenarios, then choose a path. Whichever mode you pick saves into that group.
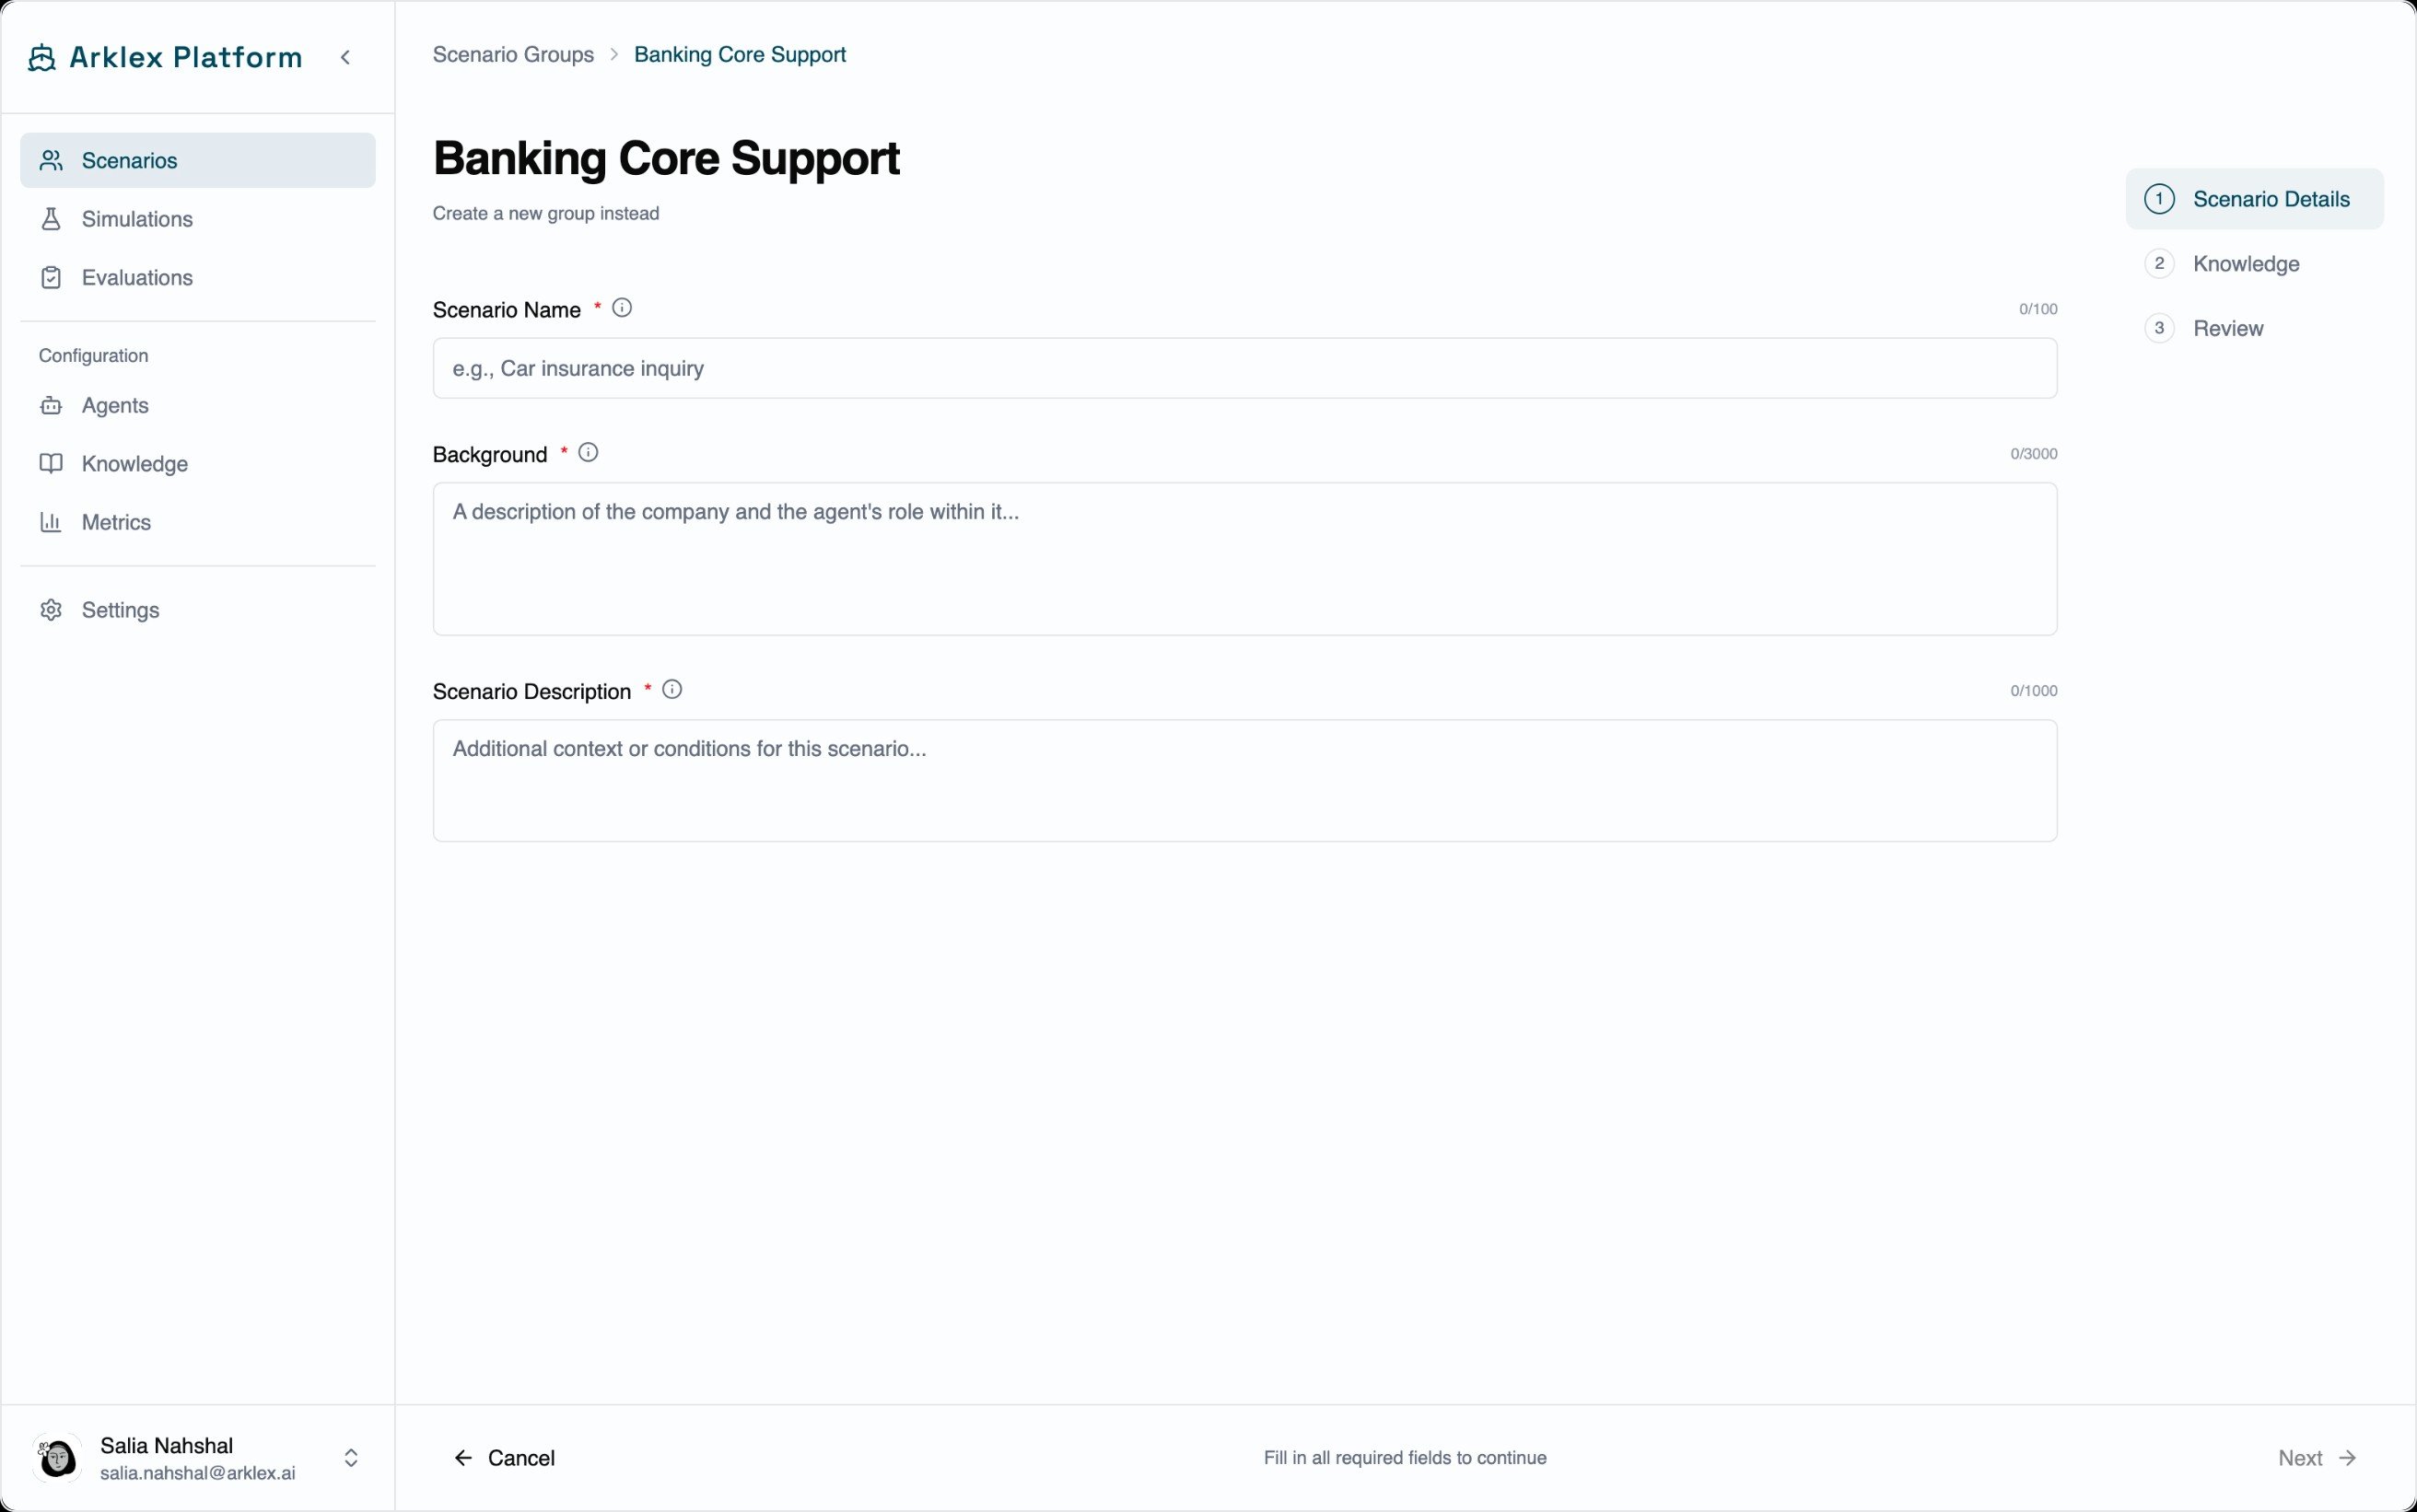
Create a Scenario
Create one scenario at a time, in three steps.1
Scenario details
Enter a scenario name, a background description of the company and agent context, a user profile describing the simulated user, and the specific goal they’re trying to accomplish.
2
Knowledge
Attach up to 10 knowledge items from the Knowledge section. These give the simulated user access to specific documents or web content during the conversation.
3
Review
Preview the scenario, make any final edits, and save it to the group.
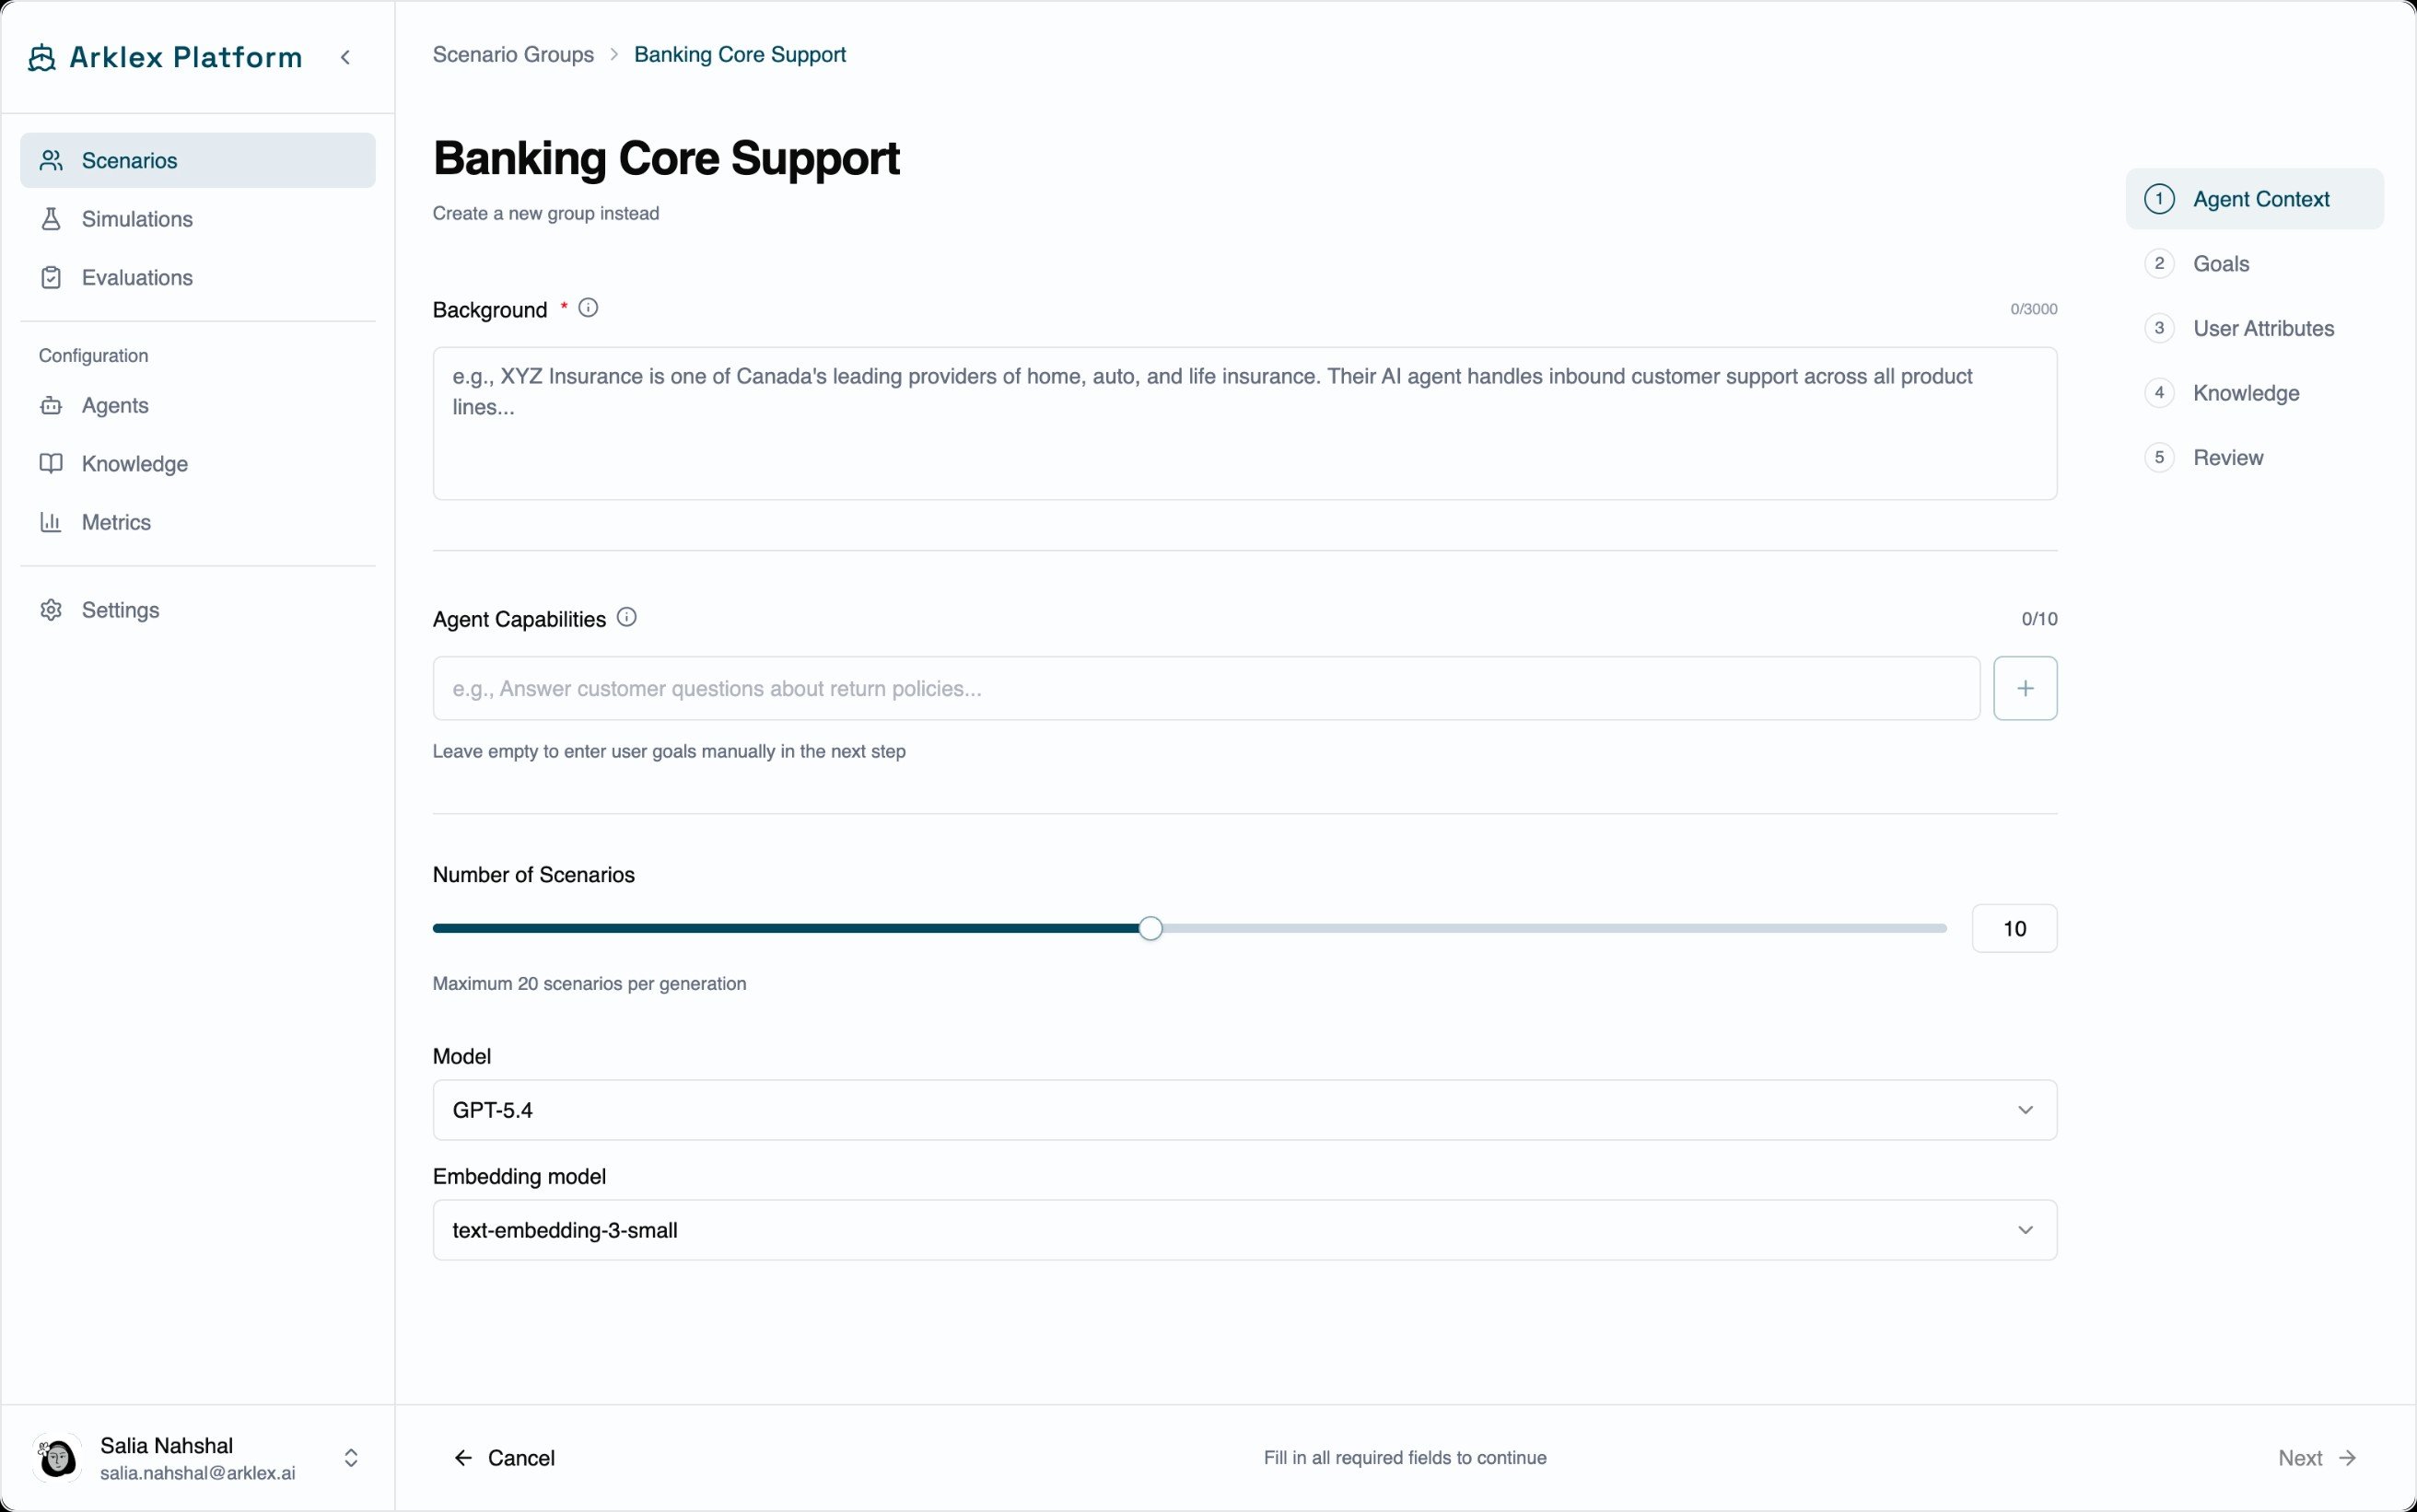
Generate at Scale
Generate up to 20 scenarios at once by defining a matrix of user attributes.1
Agent context
Describe the company, the agent’s role, and the use case. Arklex uses this to auto-detect the domain and pre-fill relevant demographic and business attribute fields.
2
Goals
Define up to 10 user goals (capped at the number of scenarios you want to generate) — the tasks or intents your simulated users will pursue.
3
User attributes
Configure the attributes that vary across generated personas, organized into tabs: Demographics, Business, Psychographics, and a Custom tab. Each attribute takes a comma-separated list of values, and Arklex draws from these to generate diverse personas.
4
Knowledge
Attach up to 100 knowledge items to ground the scenarios in real content. At least one knowledge source is required.
5
Review
Preview the generated set, edit individual scenarios, and save the group.
From Conversation History
Available only where the Adaptive Scenarios feature is enabled. If you don’t see it in the picker, contact your account team.
1
Upload conversation history
Upload a file of past conversations (e.g. exported chat logs). Arklex extracts user attribute patterns from it.
2
Review discovered attributes
The run surfaces demographic, behavioral, and domain-specific attributes observed across the uploaded conversations. Review and edit the list before generating.
3
Configure and generate
Choose how many scenarios to generate. Arklex uses the discovered attributes as the persona matrix, producing scenarios that reflect the mix of real users in your data.
4
Review and save
Preview the scenarios, make final edits, and save to the group.
Import a File
Choose Import a File to upload a JSON or CSV file of existing scenarios. The wizard parses the file, lets you review and map fields, and adds the scenarios to the current group.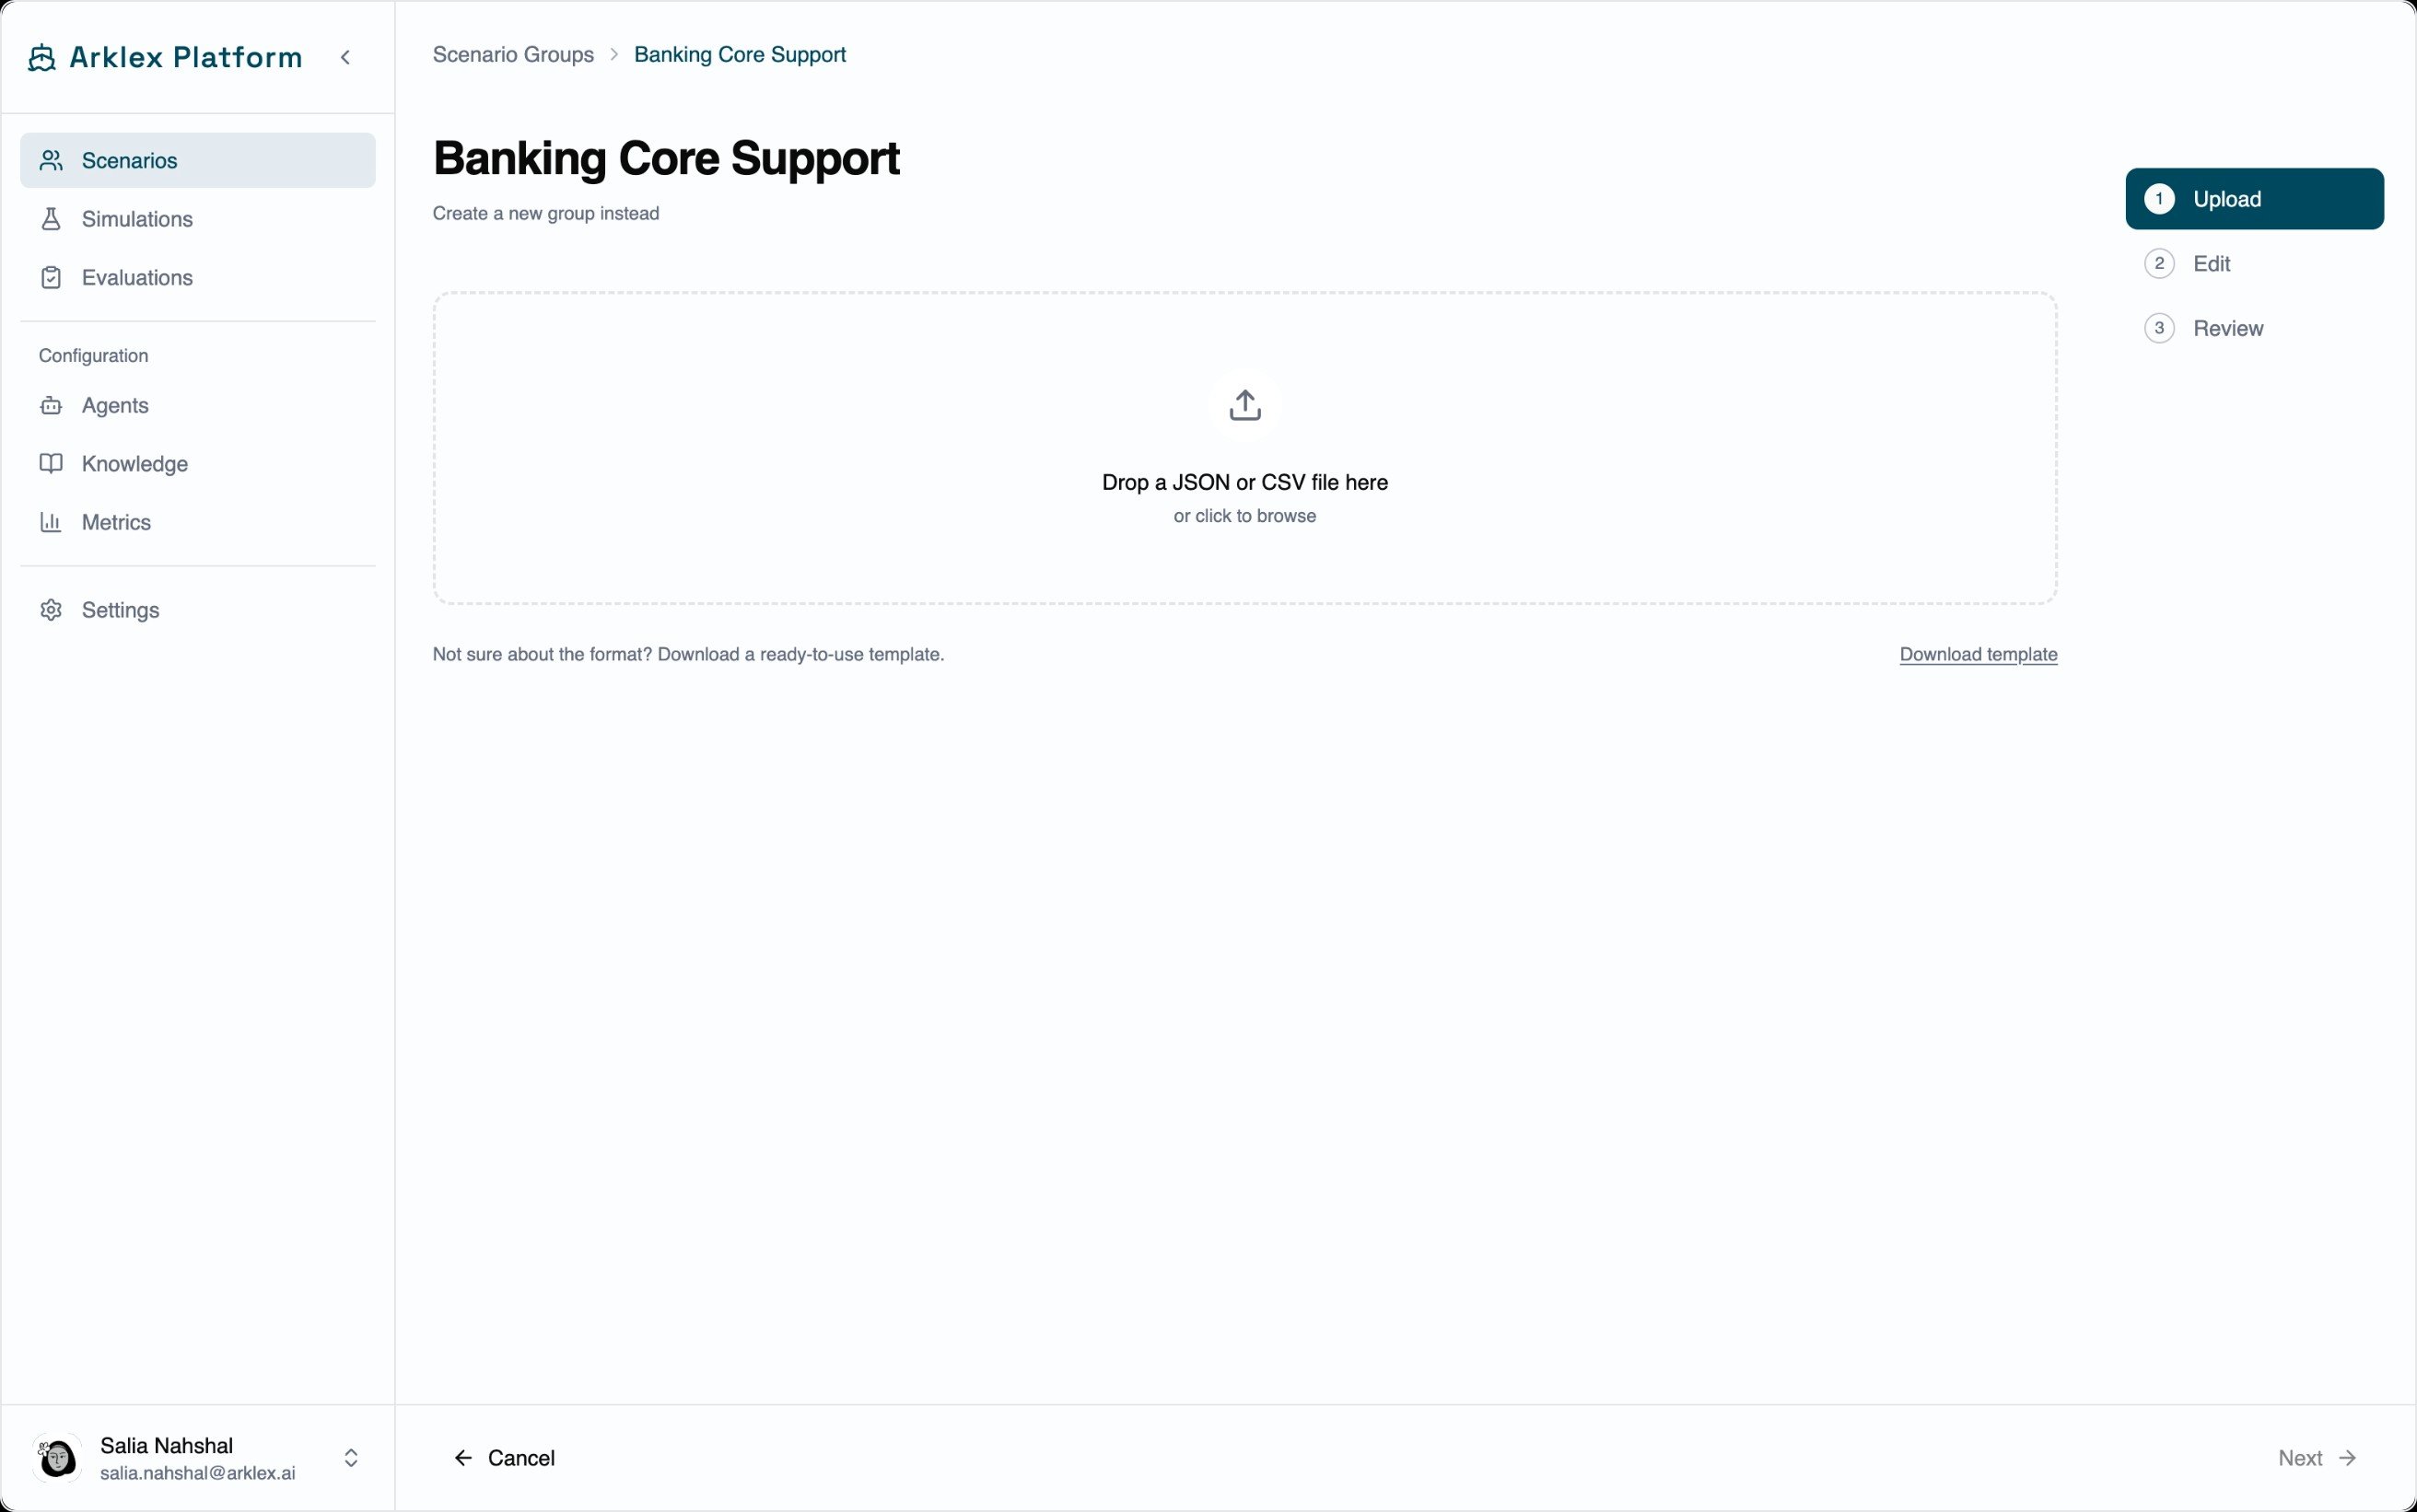
Drafts
Generating scenarios is a multi-step wizard, and your progress is saved as a draft as you go — so you can leave and pick up exactly where you left off. Drafts belong to a group, and you can keep several in progress in the same group at once. Open a group’s Drafts tab to see them. Each draft shows its mode (Create a Scenario, Generate at Scale, or From Conversation History), a status badge, and how many scenarios it will produce:- Draft
- Generating
- Failed
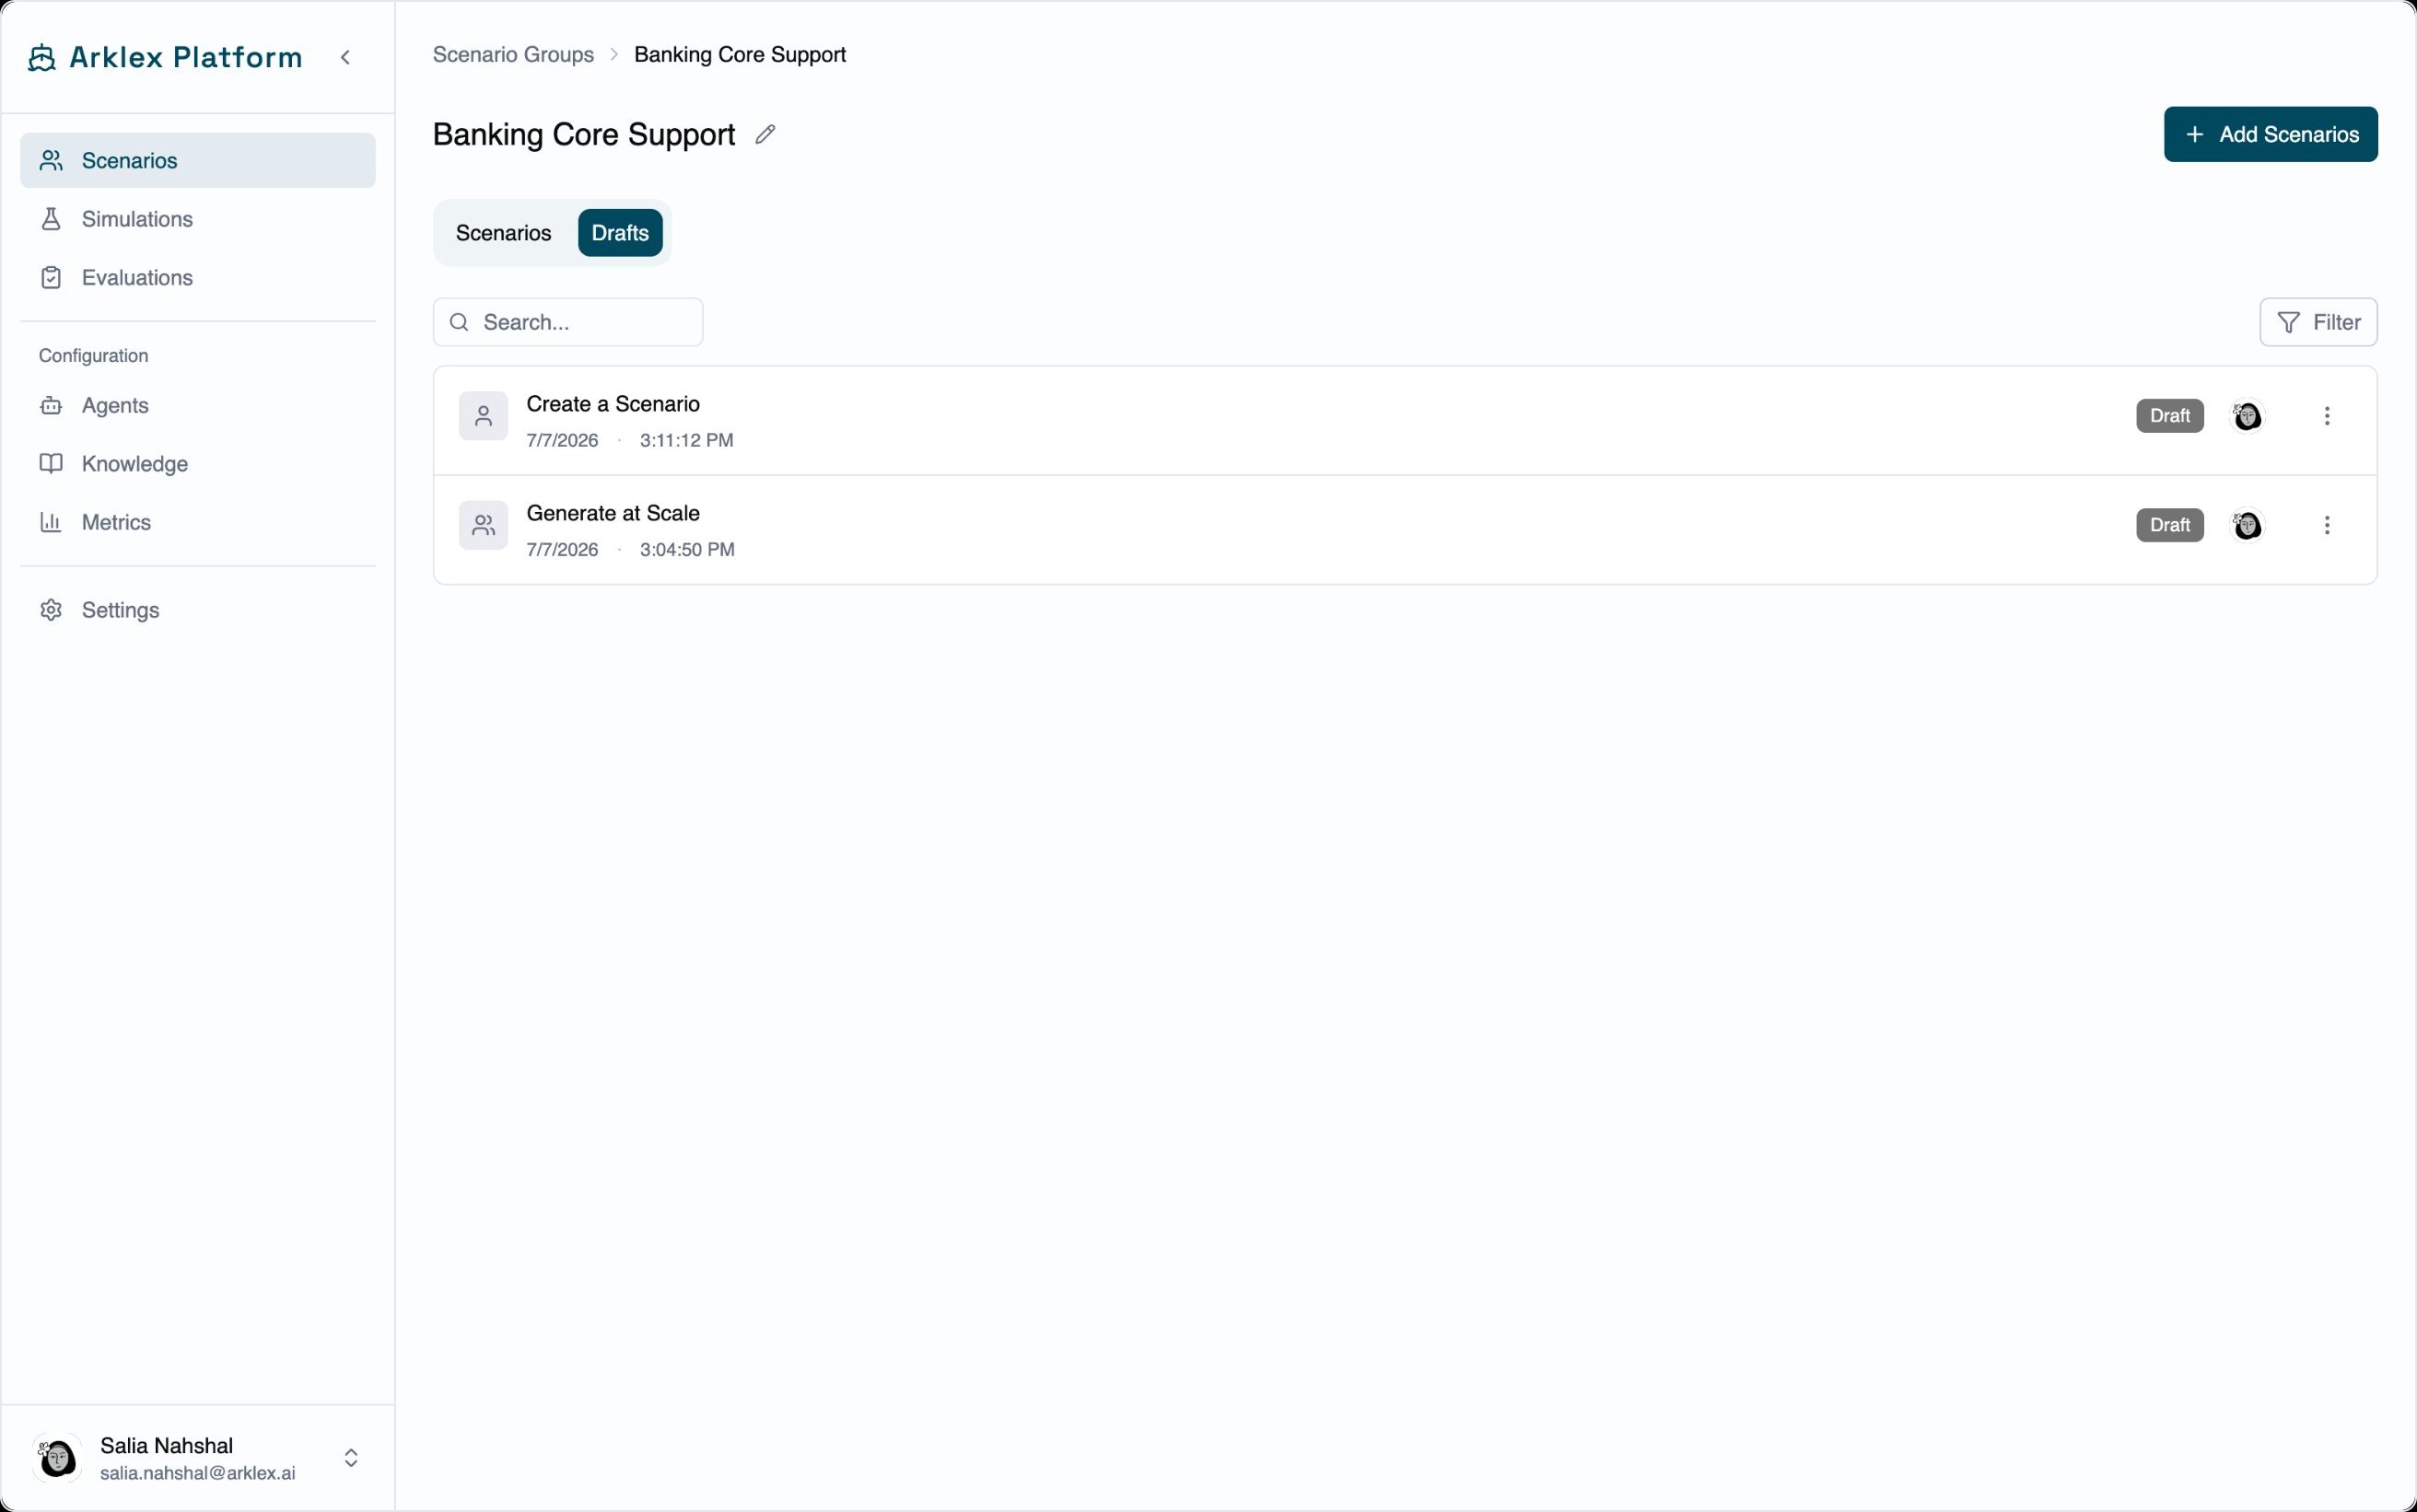
A draft still being configured — resume the wizard to continue.
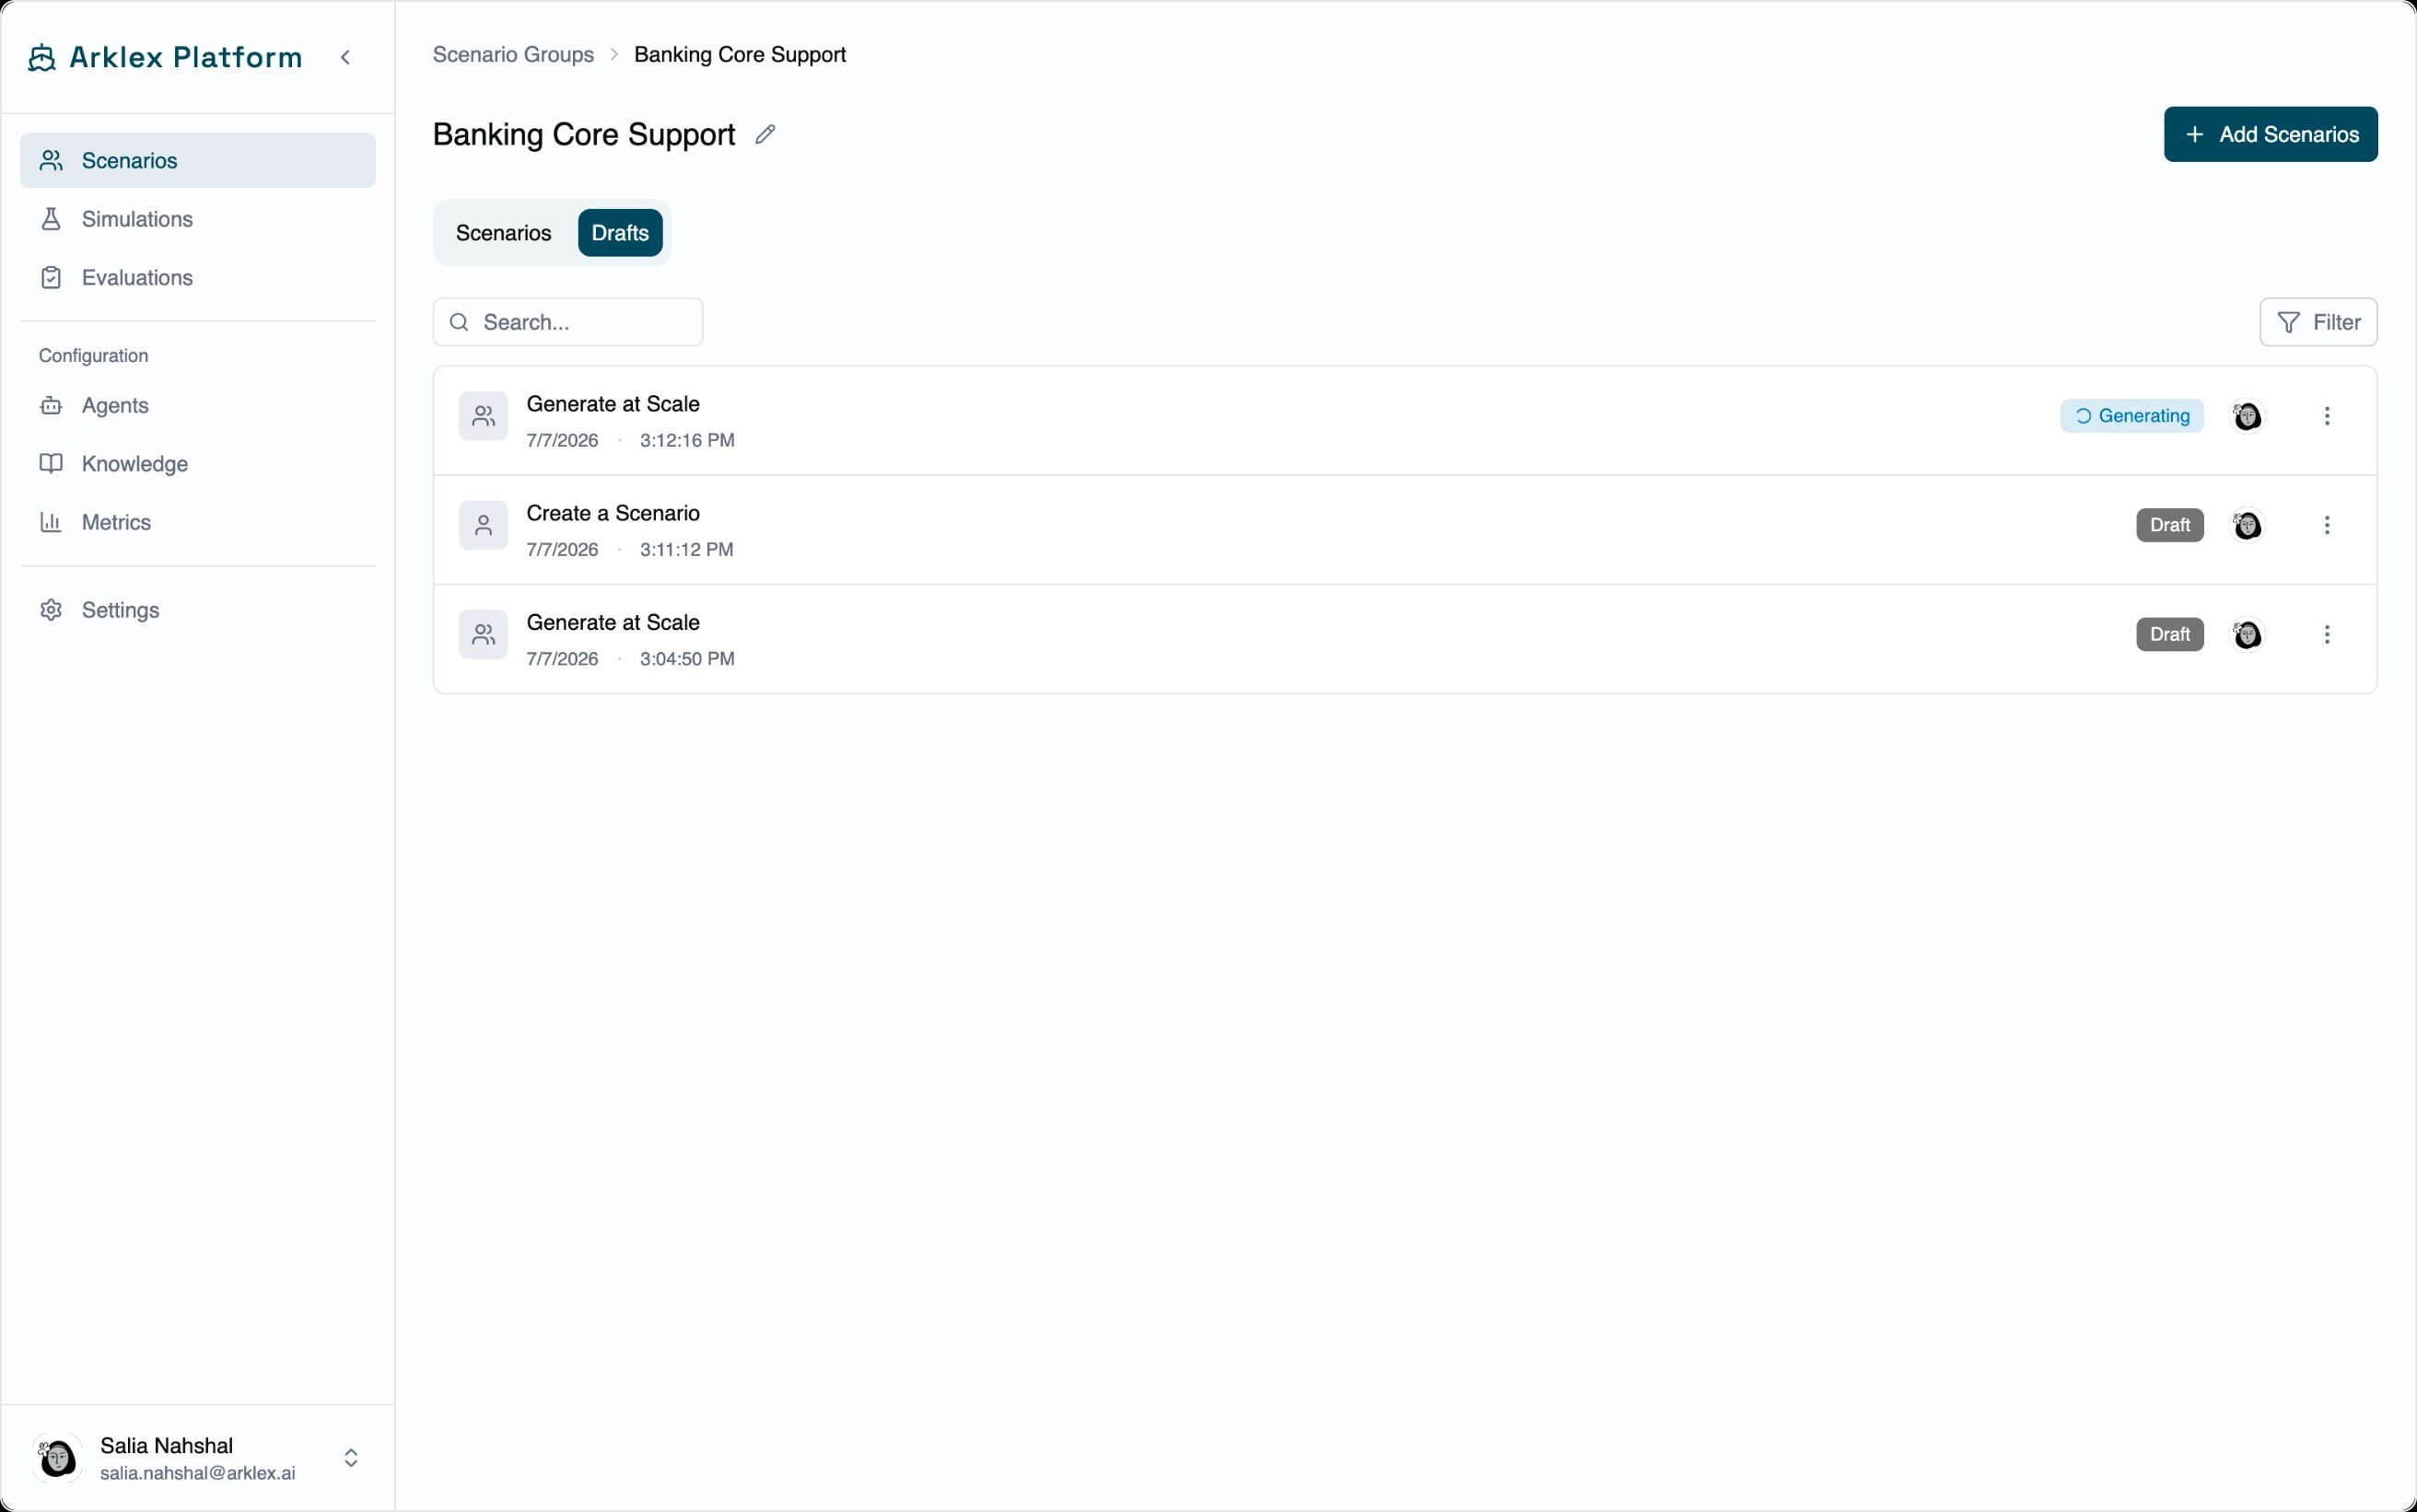
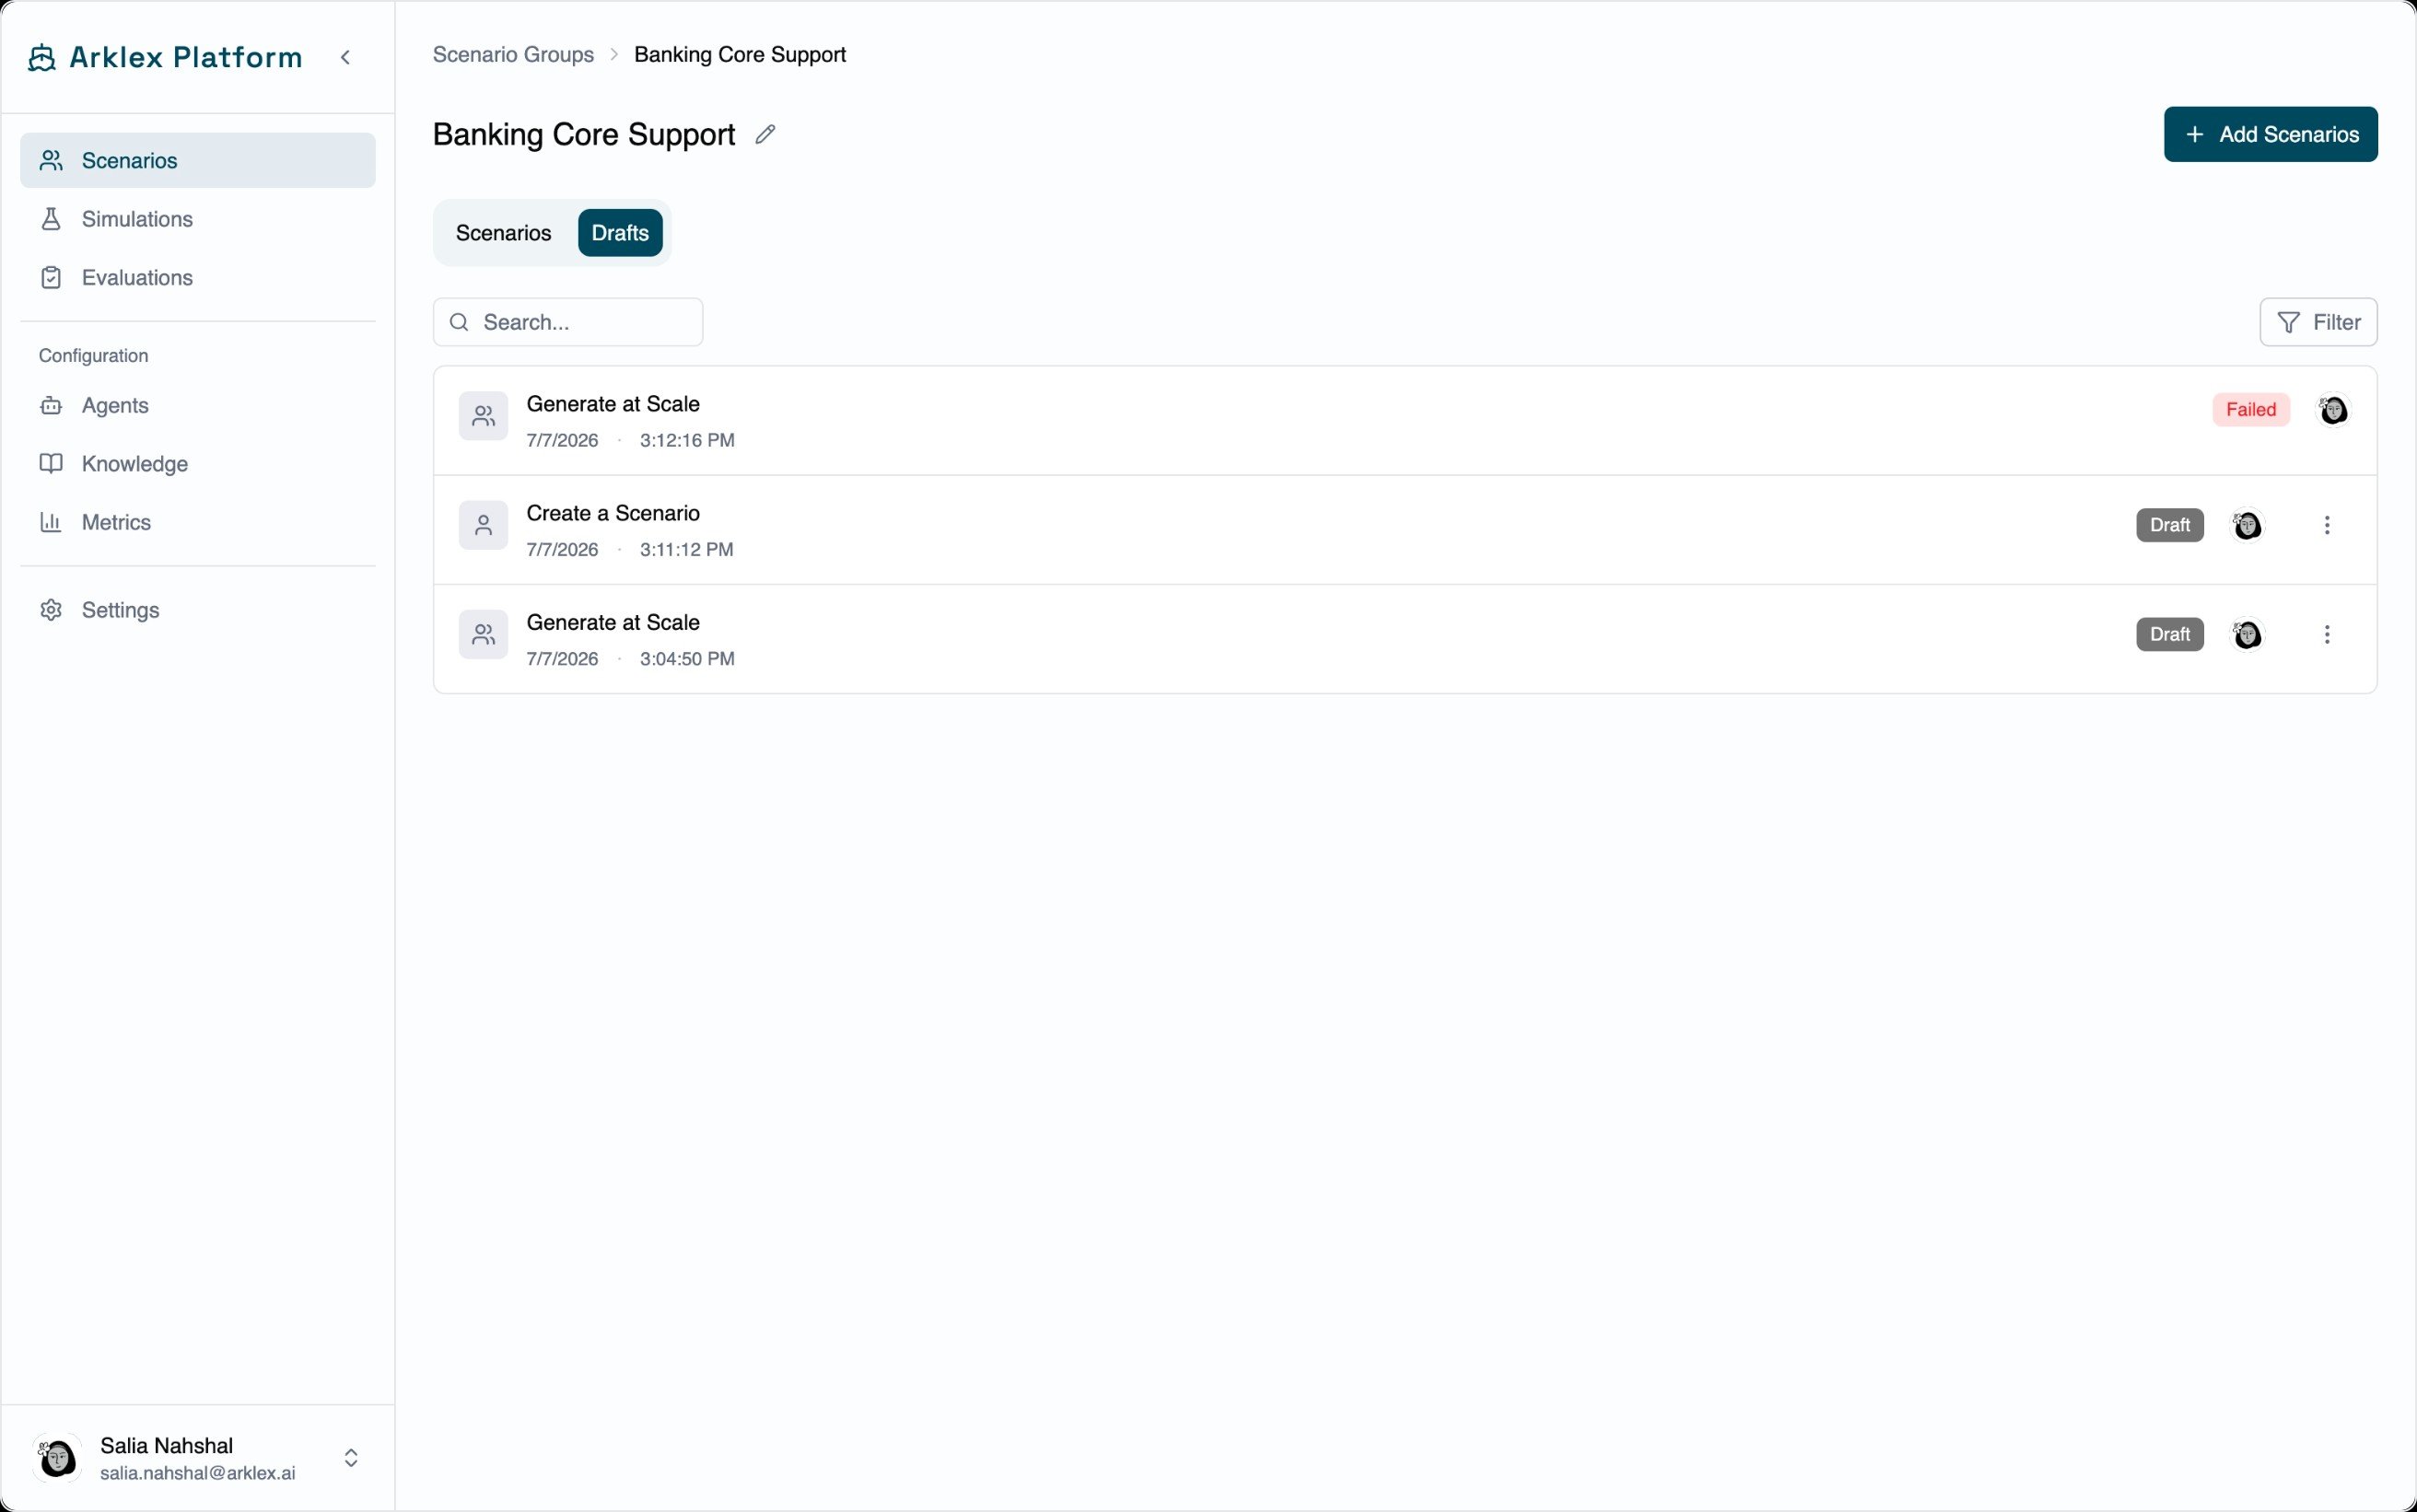
- Continue — click a draft to reopen the wizard at your last step.
- Delete — remove a draft you no longer need. Available for drafts and failed runs.
- Cancel — stop a run that’s queued or generating.
Anatomy of a scenario
Every scenario contains three parts:Manage scenarios
View — Click a scenario row within a group to see its goal, profile, and attached knowledge documents. Edit — Open the scenario and click Edit. Changes save per-field, and versions are tracked so you can see what changed between simulation runs. Delete — Open the scenario and use the delete action. Scenarios used in completed simulations remain accessible in those historical records even after deletion.Select scenarios for a simulation
When creating a simulation, the Scenarios field lists all available scenarios grouped by scenario group. You can:- Select individual scenarios with their checkbox.
- Select every scenario in a group with Select Group.
- Select all scenarios across all groups with Select All.
- Preview a scenario’s goal, profile, and knowledge base by clicking its name or the chevron icon.
FAQ
How many scenarios can I generate at once?
How many scenarios can I generate at once?
Generate at Scale supports up to 20 scenarios per run. For a first pass, 10–15 scenarios covering your most important user intents is a good starting point — you can always add more groups or run additional rounds.
How many scenarios should I include in a simulation?
How many scenarios should I include in a simulation?
Start with 5–15 scenarios covering your most important intents. Once you’ve reviewed the initial results, run a new simulation with a broader set.
Can I leave a scenario generation half-finished and come back?
Can I leave a scenario generation half-finished and come back?
Yes. Every step of the generation wizard is saved as a draft, so you can close it and resume later from the group’s Drafts tab. You can keep several drafts in progress in the same group, and discard a draft (or a failed run) from that tab when you no longer need it.
What makes a good scenario goal?
What makes a good scenario goal?
Specific enough to drive a focused conversation, but not so prescriptive that it removes all variation:
- Too vague: “Talk to the agent about your account.”
- Too prescriptive: “Say ‘I want to dispute charge #12345 on account #67890 from 2024-01-15 and I expect a refund within 3 days.’”
- Good: “You spotted a $240 charge you don’t recognize on last month’s statement and want it investigated and refunded.”
Can scenarios reference documents the agent also has access to?
Can scenarios reference documents the agent also has access to?
Yes. Attaching a document to a scenario gives the simulated user knowledge of its contents, which is useful for testing whether the agent’s responses align with its source material — especially relevant for faithfulness and relevance evaluations.
How do scenario versions work?
How do scenario versions work?
Each time you edit and save a scenario, a new version is created. Simulations record which version of each scenario they used, so historical results stay accurate even if the scenario changes later.